Deploy a React application on AWS with CloudFront and S3
A tutorial using the AWS console
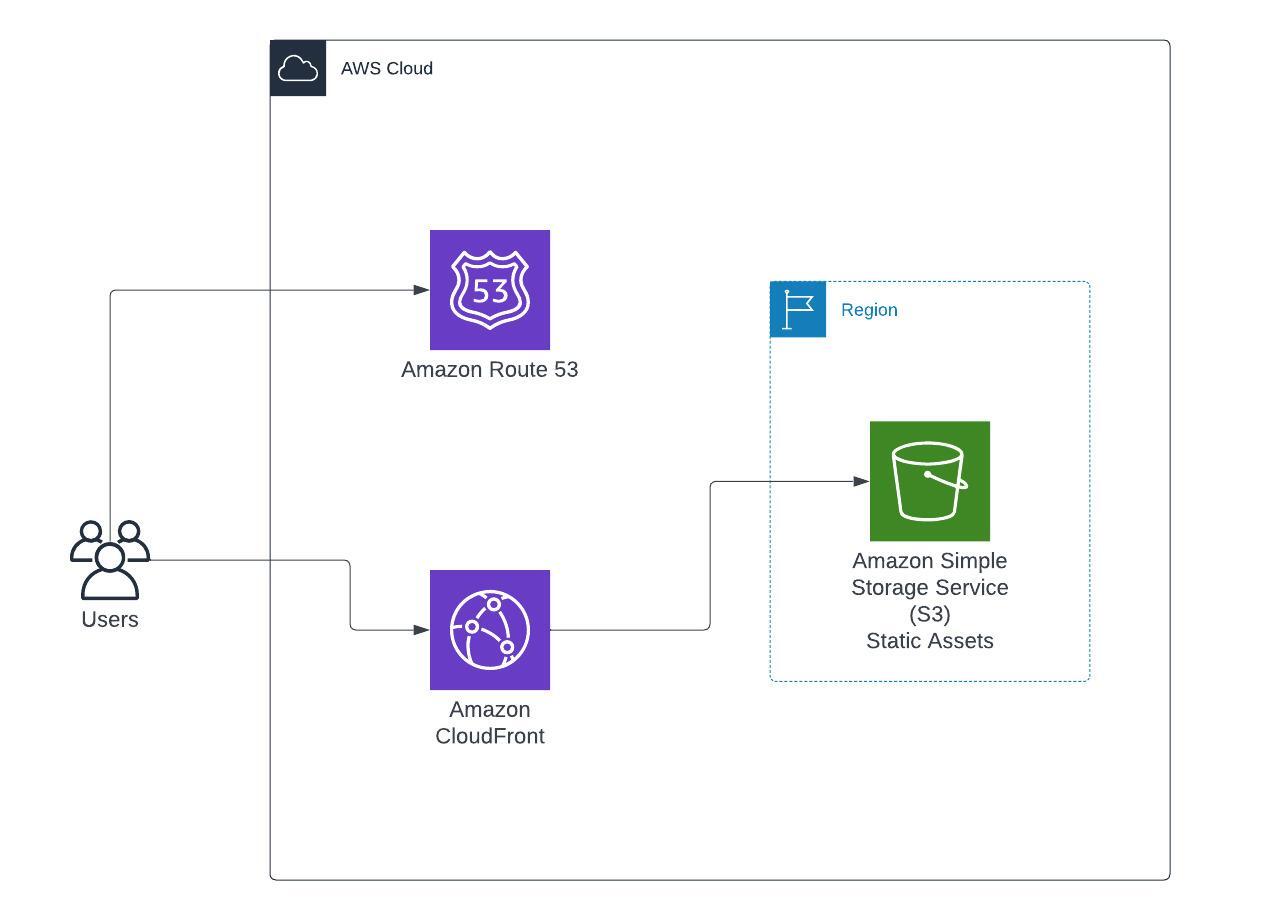
Web applications built with React are commonly hosted and served as static files, so if you are building a Single Page Application and you want to host it on AWS you can use the combination of CloudFront and S3.
Introduction
Cloudfront is a Content Distribution Network (CDN), a service that allows you to host your content close to the final users worldwide with low latencies. To know more about CloudFront and CDNs check my article.
S3 is a robust and reliable object storage that will scale on demand and let you only pay for used resources, check it on the AWS page.
Setup React
This setup will work with all static websites but let's focus on React.
So let's start with a simple hello world application created with Create React App https://create-react-app.dev/docs/getting-started
npx create-react-app my-app
cd my-app
npm start
This will create our app and start it, so we can take a look at it in our browser locally on the PC.
Now that we have our sample application ready let's take a look at the structure of the project:
my-app
├── README.md
├── node_modules
├── package.json
├── .gitignore
├── public
│   ├── favicon.ico
│   ├── index.html
│   ├── logo192.png
│   ├── logo512.png
│   ├── manifest.json
│   └── robots.txt
└── src
    ├── App.css
    ├── App.js
    ├── App.test.js
    ├── index.css
    ├── index.js
    ├── logo.svg
    ├── serviceWorker.js
    └── setupTests.js
The structure contains multiple js and media files but those are only the source of our final application, before using it in production we need to build the application and generate an artifact.
We can now kill the React development server we just started and instead we can now build our application:
npm run build
The output of the command will be put in the build directory. All the files inside our build directory are what will be uploaded to our static hosting.
Create S3 resources
With our artifacts ready we can now create an S3 bucket, for this tutorial we will use the AWS console but for your production workloads, I suggest using IaC tools like CDK, Terraform or Cloudformation.
Let's create our bucket:
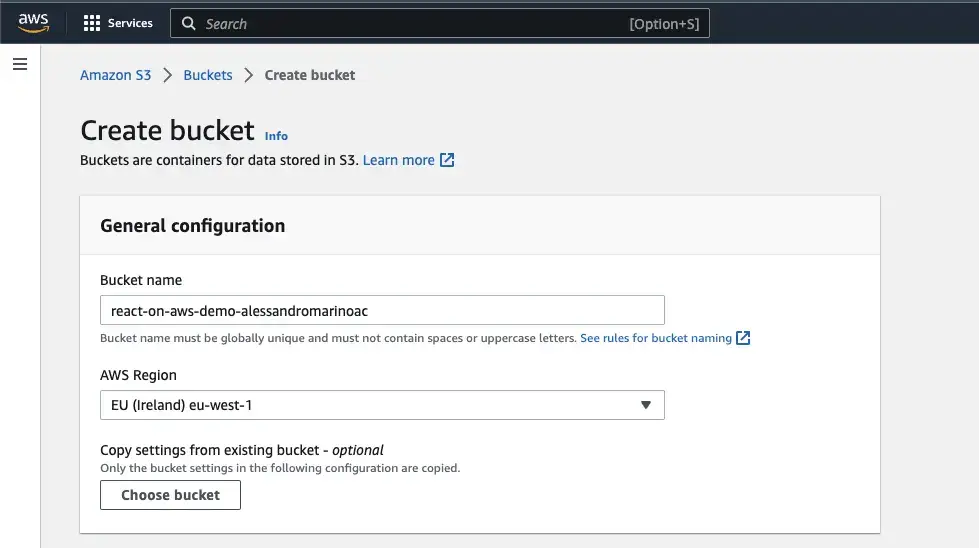
After creating it, the empty bucket is ready to receive our artifacts:
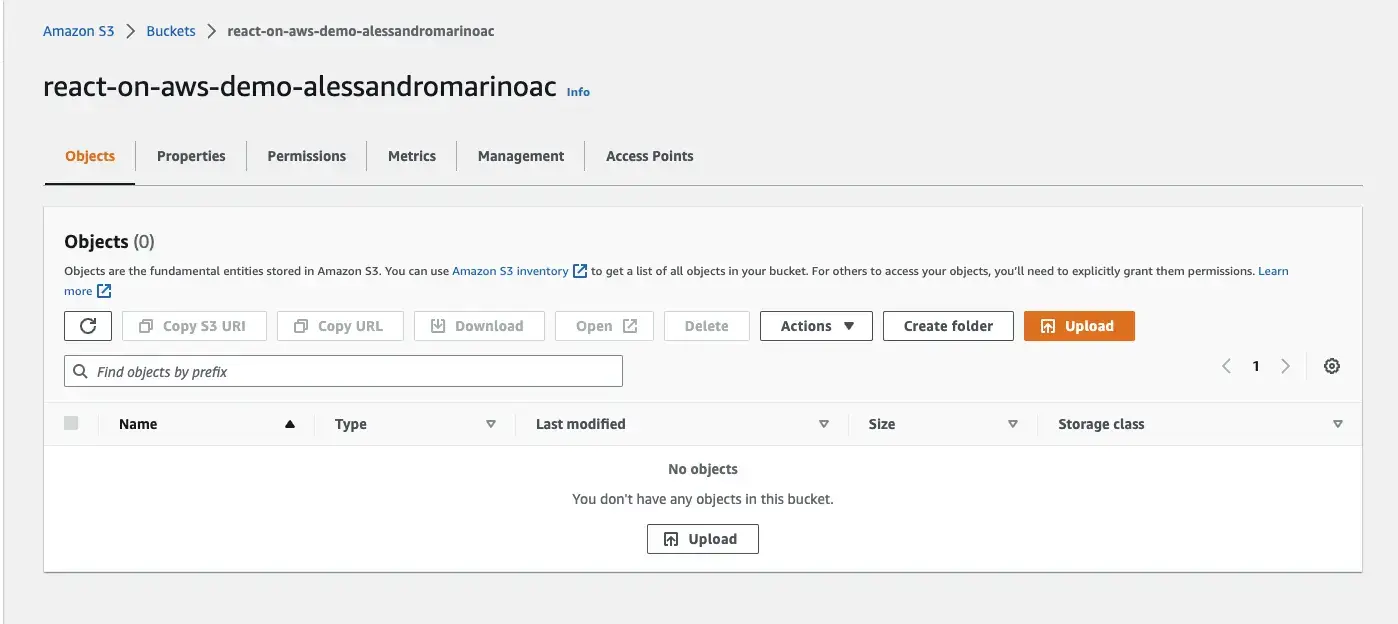
We can now upload our artifacts, let's do it with the aws-cli, and follow the blog for a future post where we automate this with CI/CD.
aws s3 sync --delete build s3://react-on-aws-demo-alessandromarinoac
Create CloudFront resources
Let's create now our CloudFront distribution and let's select our bucket as origin, using the console make this process really simple.
To secure the connection between CloudFront and the bucket we need to create or use an existing Origin Access Control Settings.
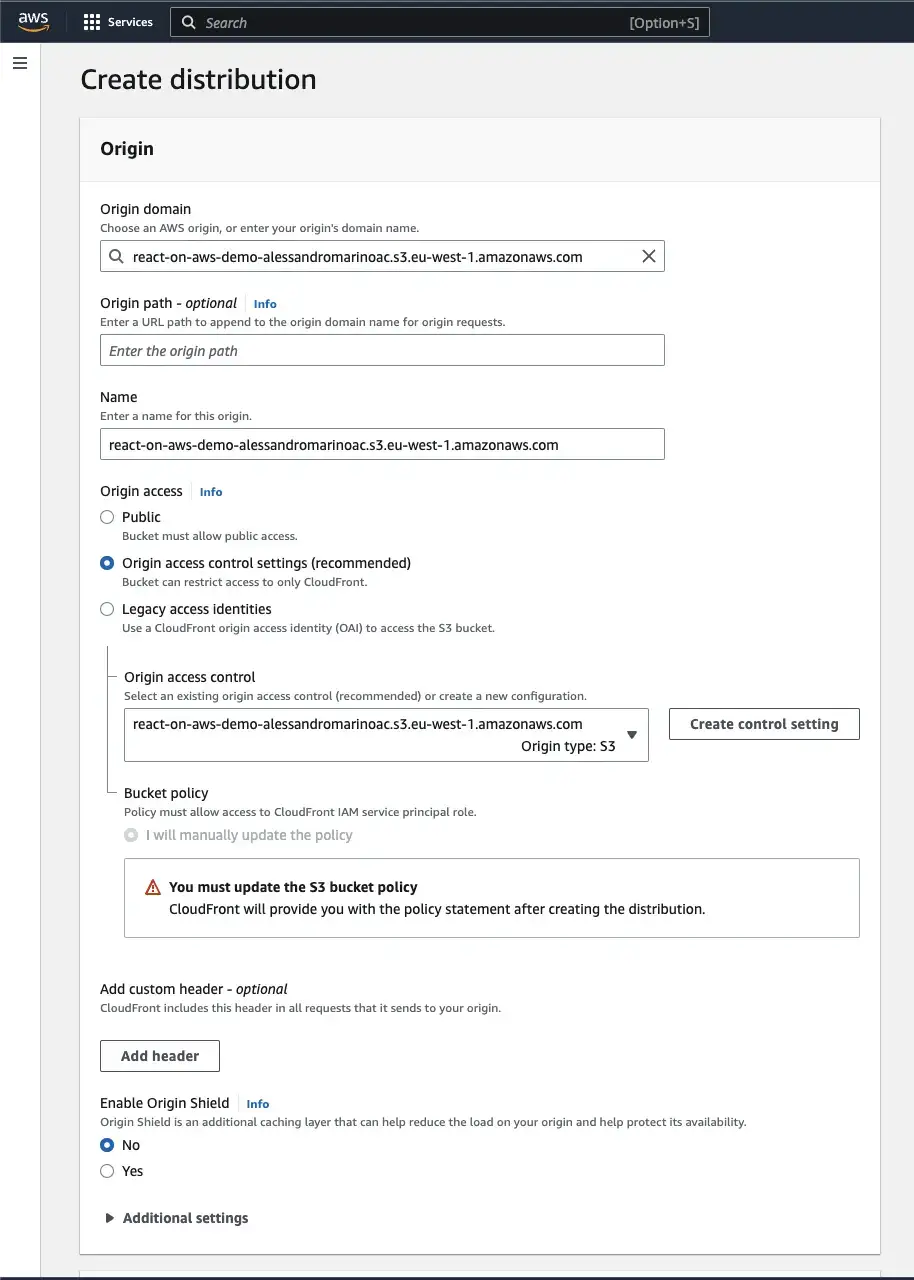
If you don't already have one Control Settings let's create it using the button on the right:
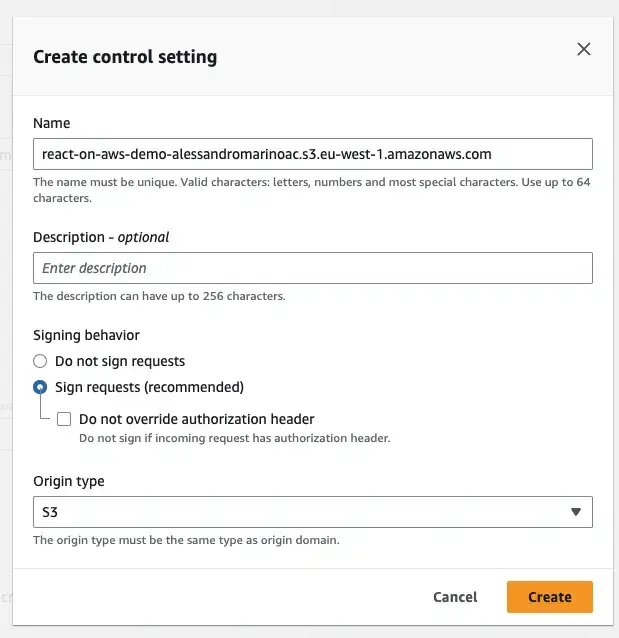
Now with the origin secured, we can start setting up the cache options for our CloudFront distribution, we will for example redirect all HTTP requests to HTTPS.
We can also create a custom cache policy if we need to specify specific TTL or caching options, if not we can use the default CachingOptimized that will help us save some time.
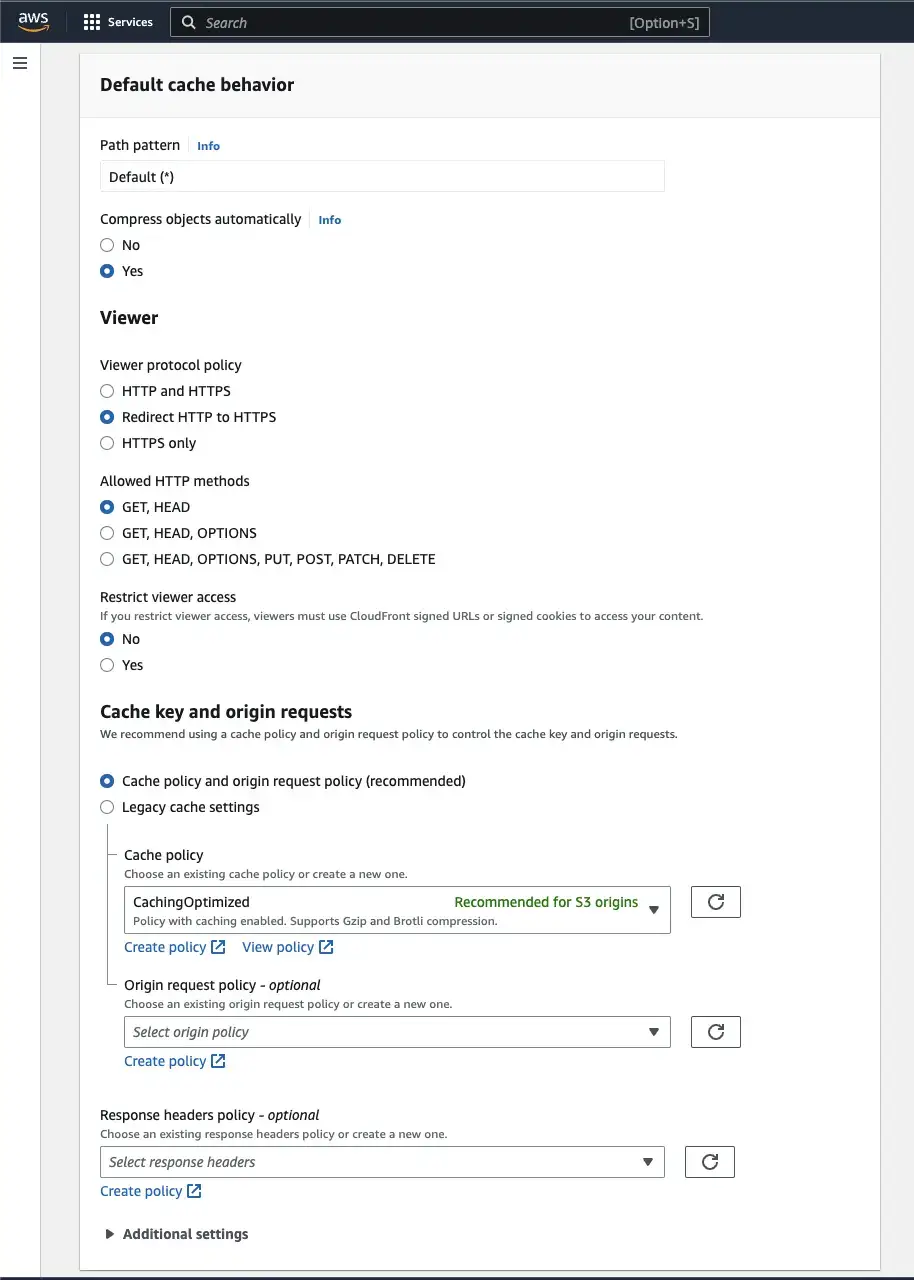
Let's go ahead and scroll to the general settings section, here we can select a price class if we want to save some money or we can for example set our default root object that will be necessary to make React work properly.
We are setting the root object as index.html
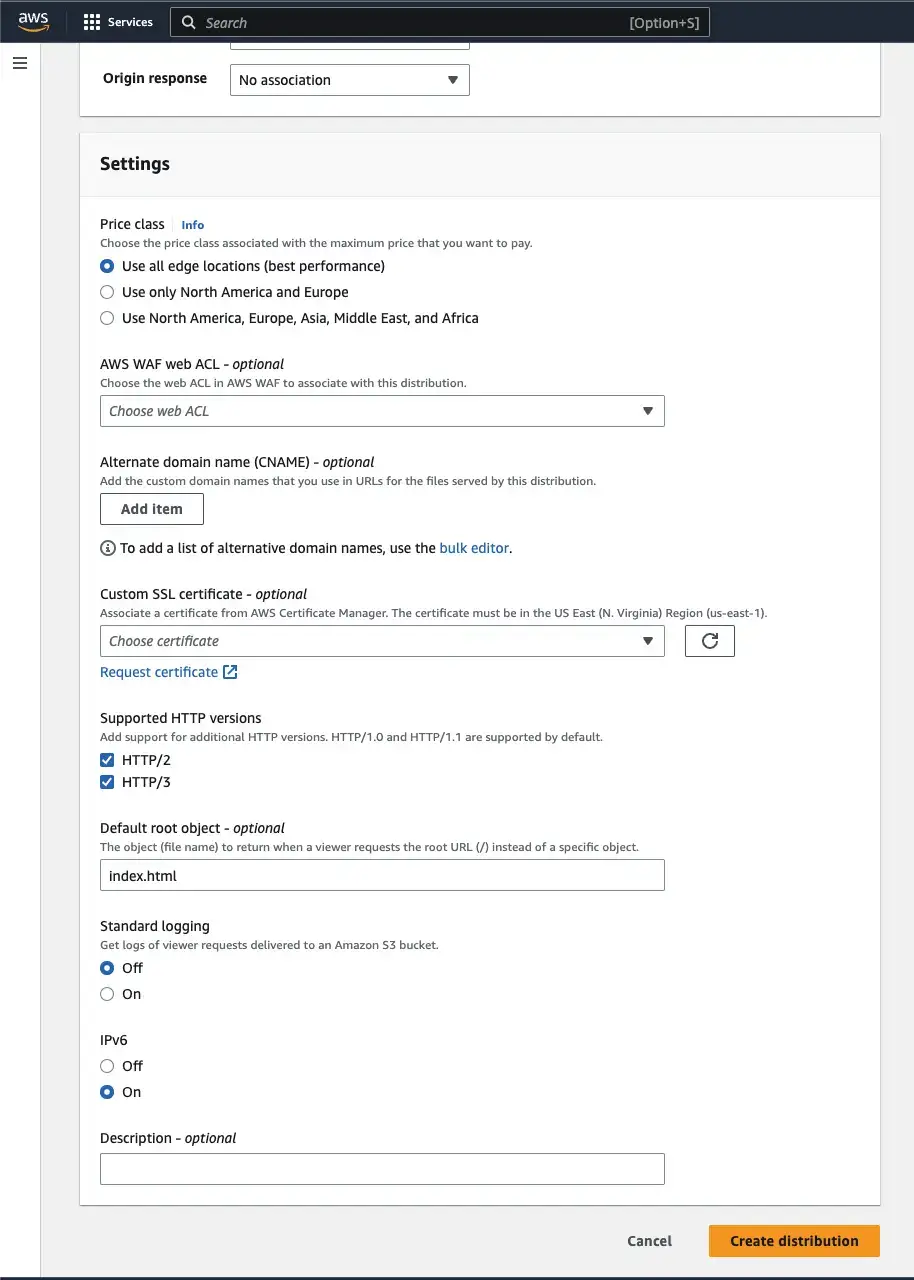
We can now click on Create distribution and we have the confirmation. The distribution needs some time to be ready (~10min) so have some patience here.

Secure our S3 Bucket
Now as the console advise us to, let's copy the S3 bucket policy from the blue banner and let's go back to our S3 bucket to apply it. We need to navigate to the bucket and then to the Permission tab:
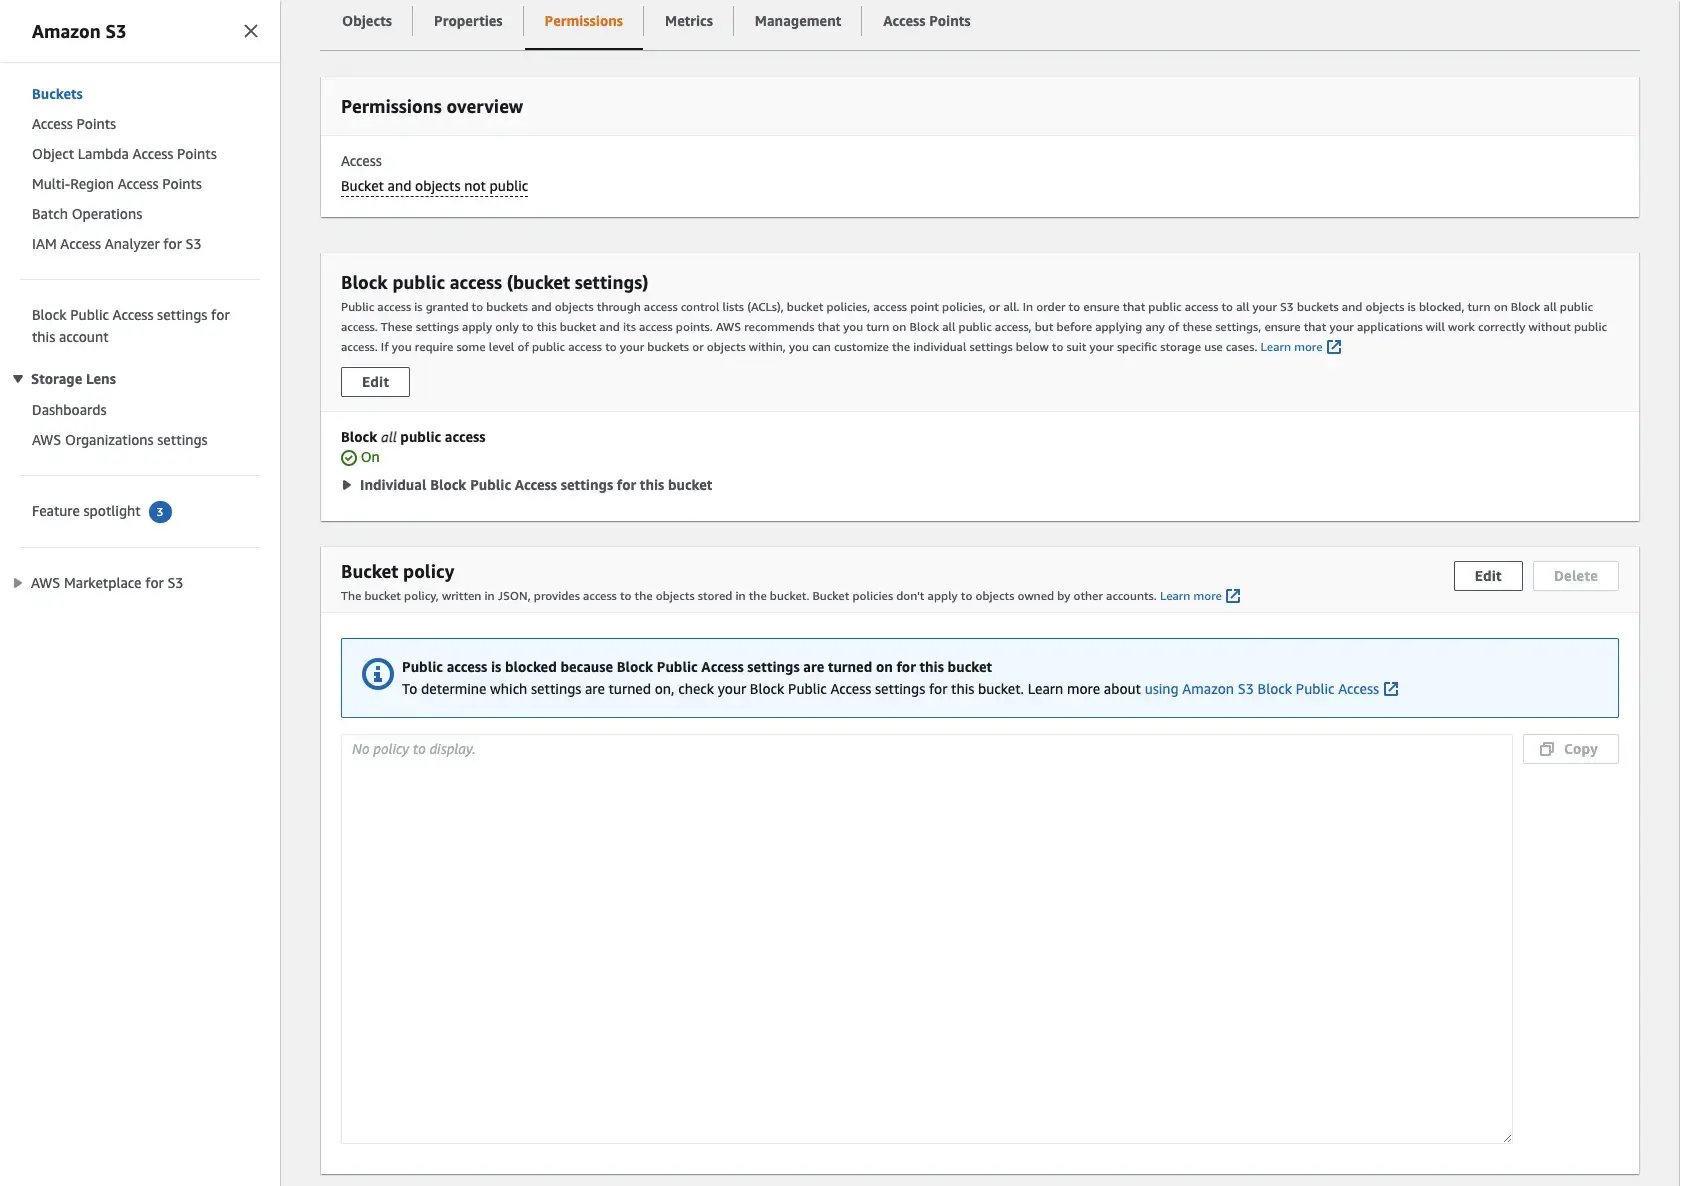
We can now apply the copied S3 Bucket Policy to restrict access to the bucket:
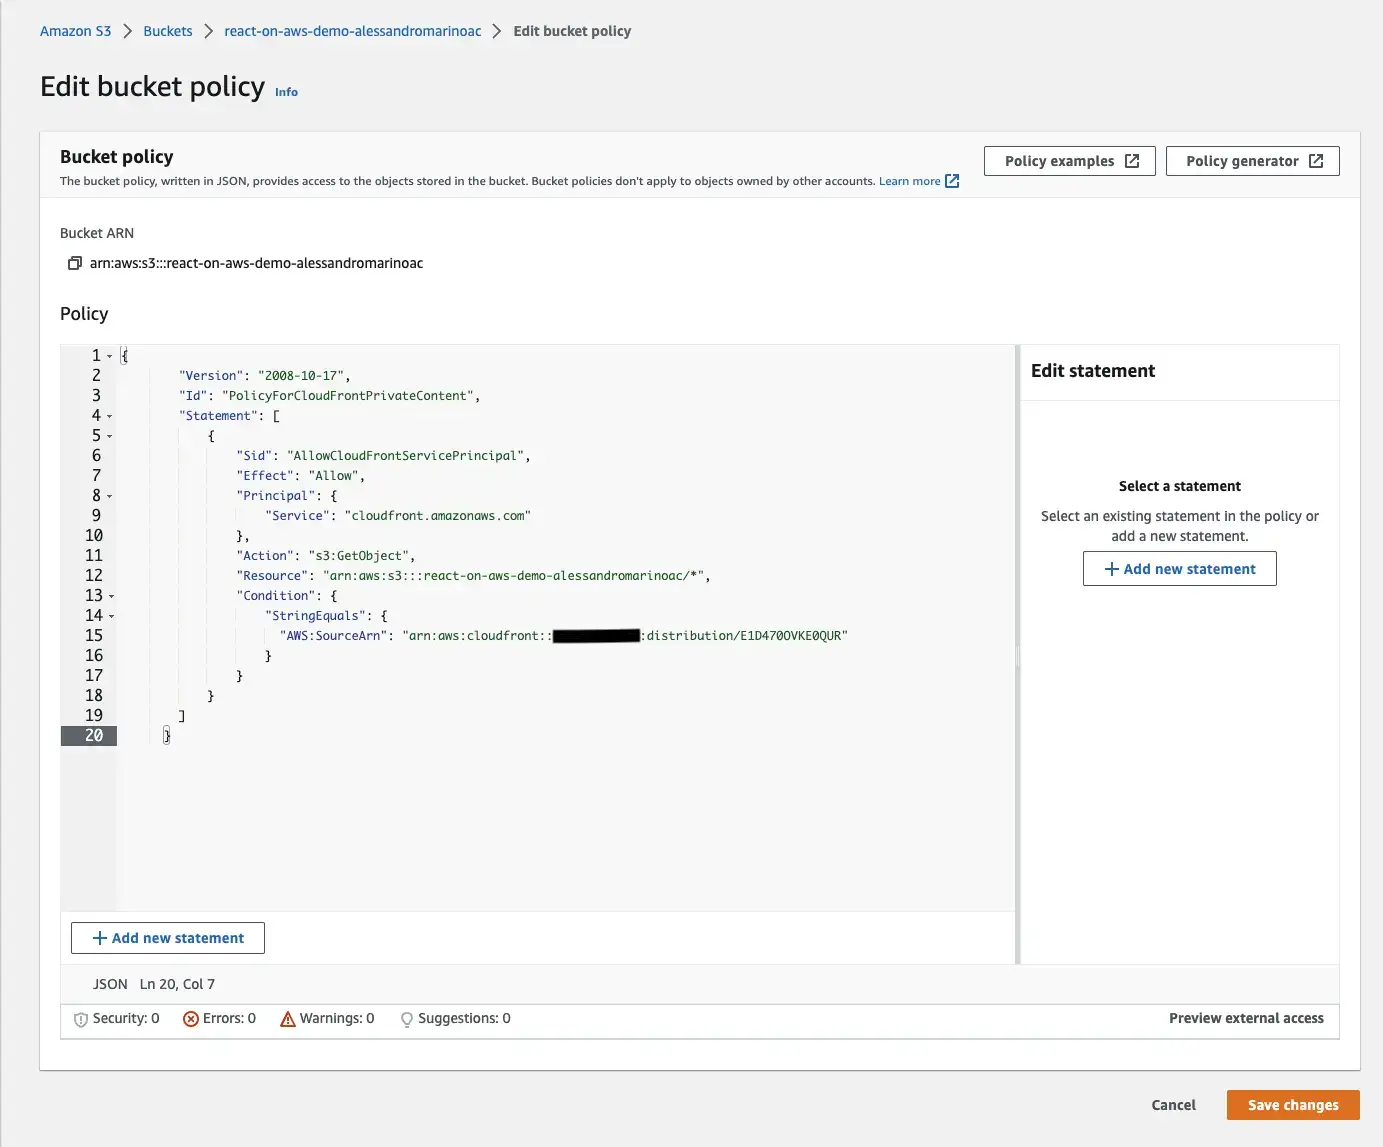
With this policy in place, we are authorizing CloudFront to read from our bucket, without the need of having a public bucket.
Check if it's working
Let's now go back to the CloudFront console and retrieve the distribution domain name to check our app online:
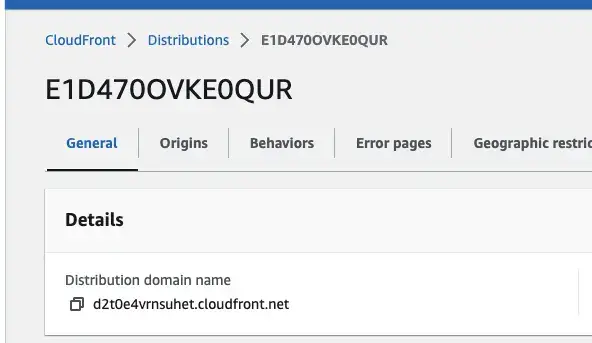
If we use the browser to open that link, we can see our app:
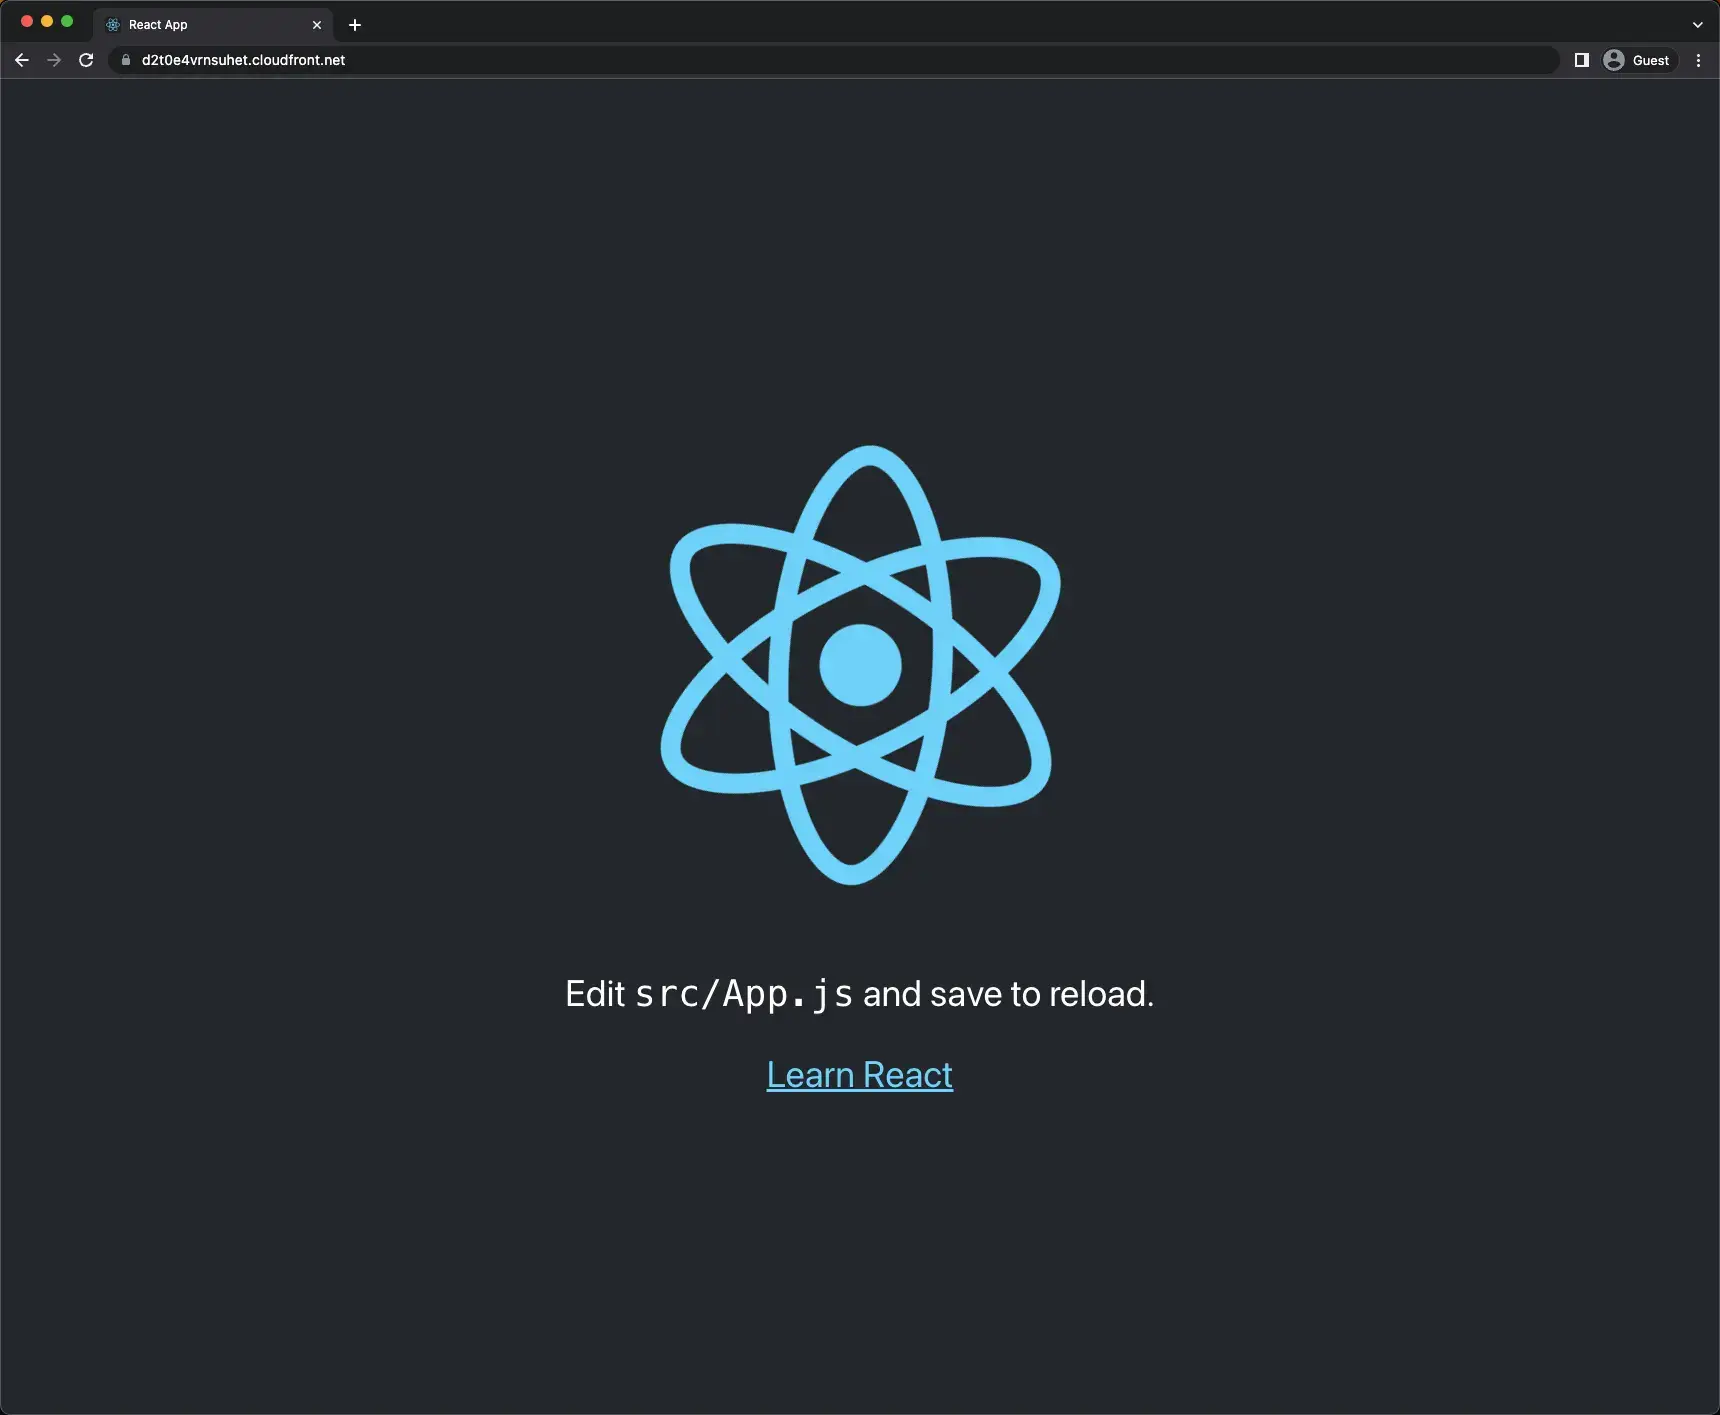
So now we have our React application up and running.
Setup Errors Pages
There is still a step we need to take. If we try to navigate to any page other than the root we will get an error:
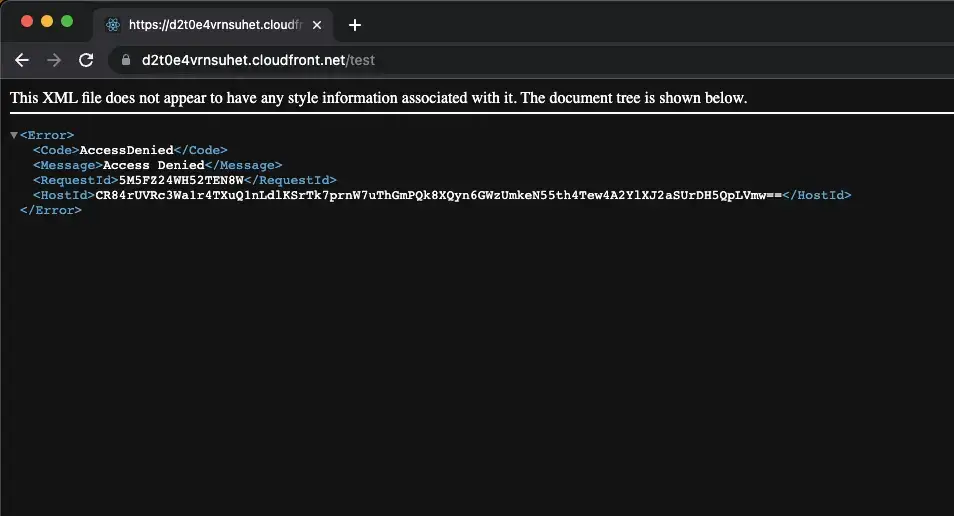
We need to set Error Pages on CloudFront so instead of getting errors from CloudFront we will let React take care of those.
Let's create two custom error responses, one for 403 Forbidden and one for 404 Not Found , both will have a response code of 200 OK.
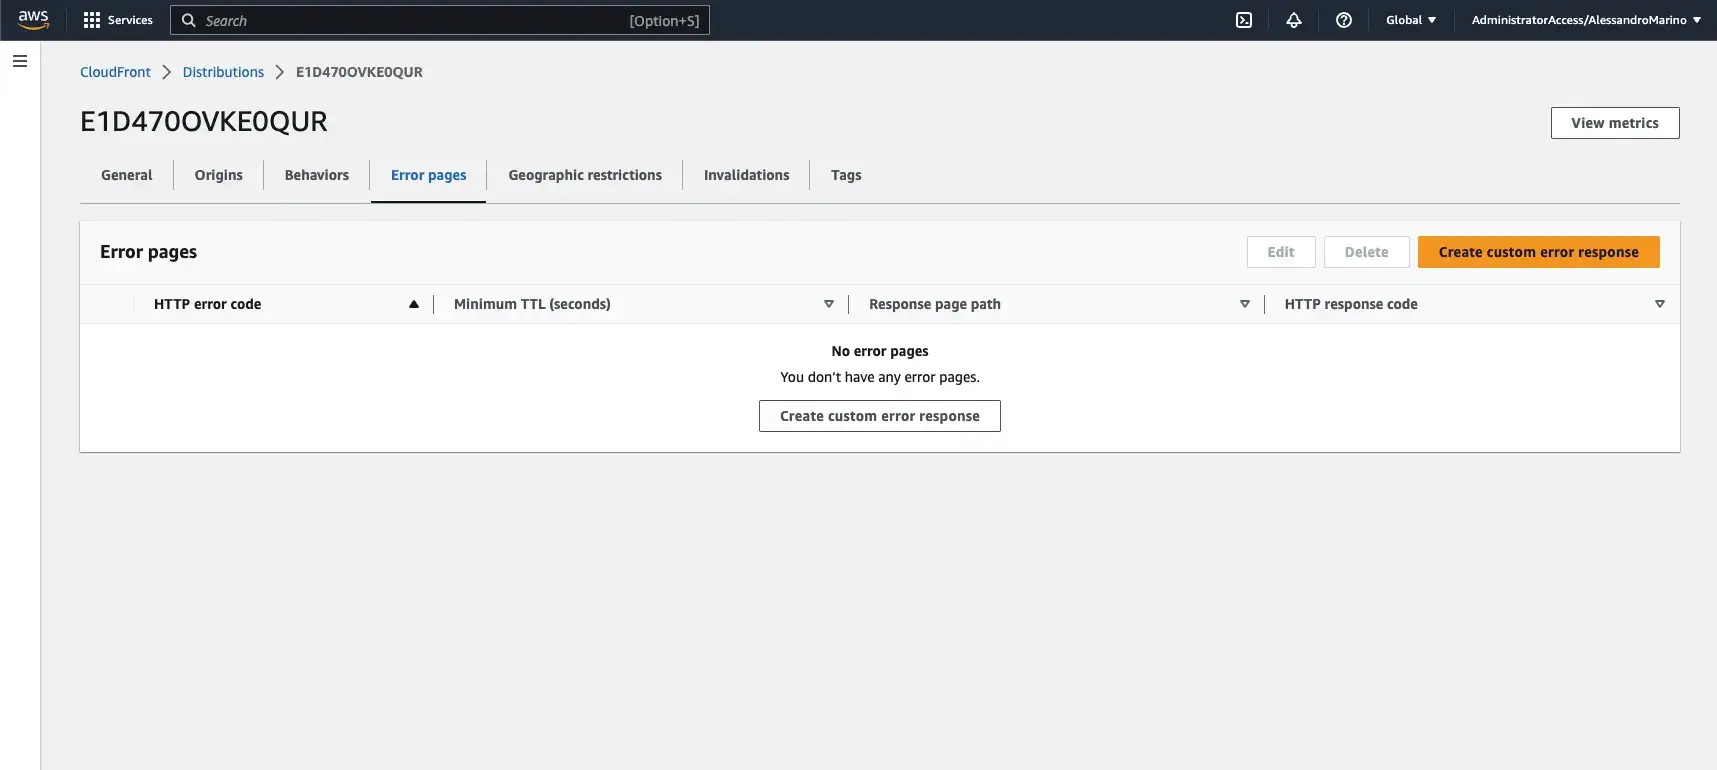
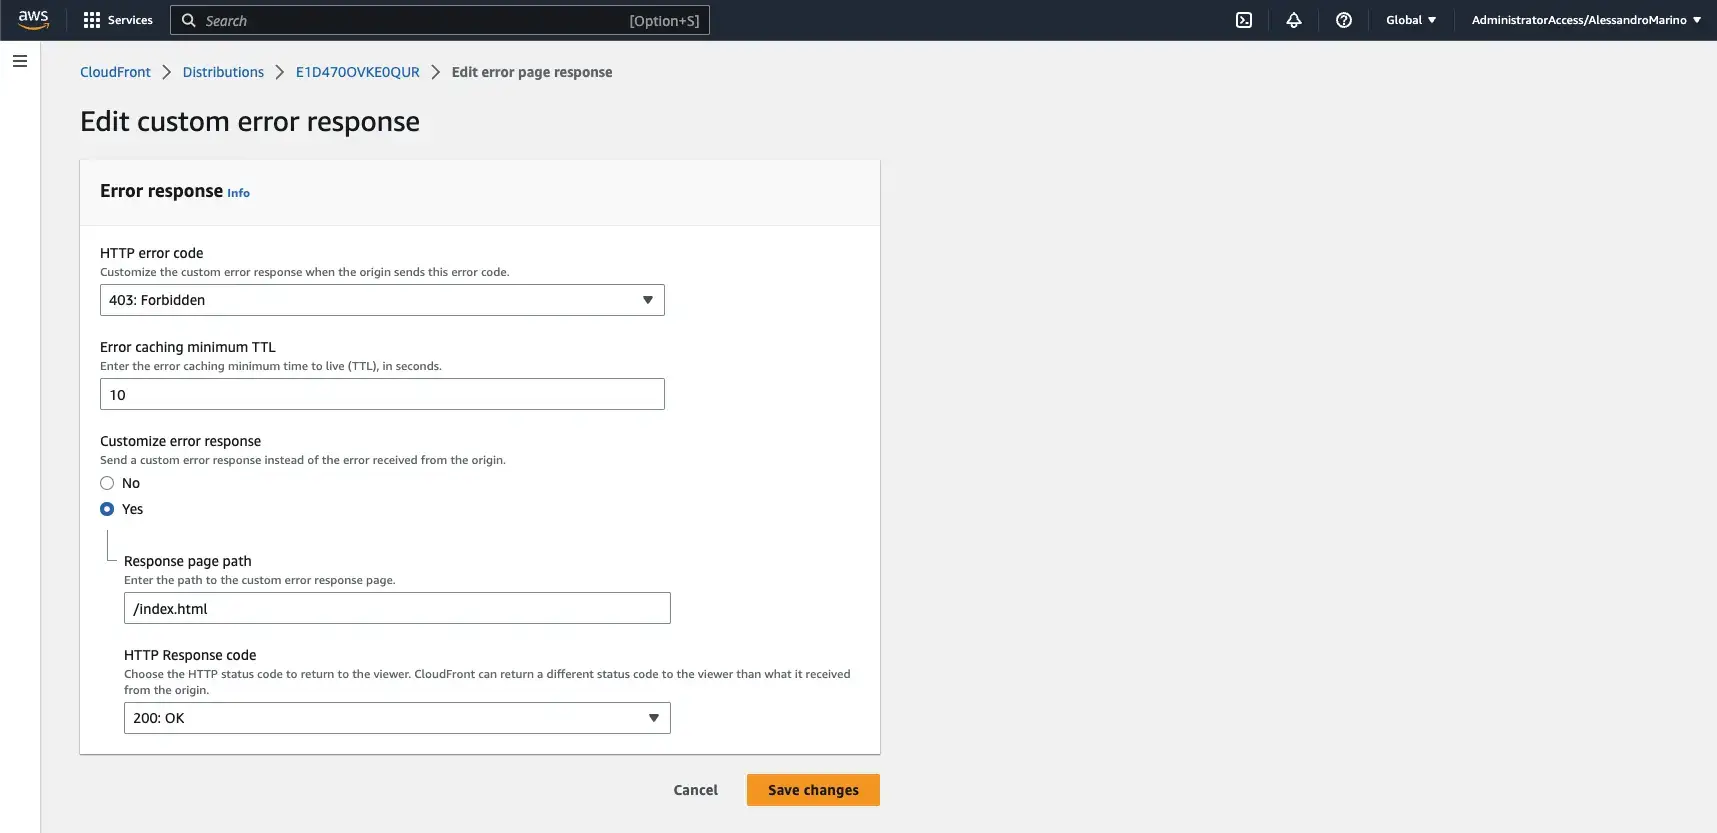
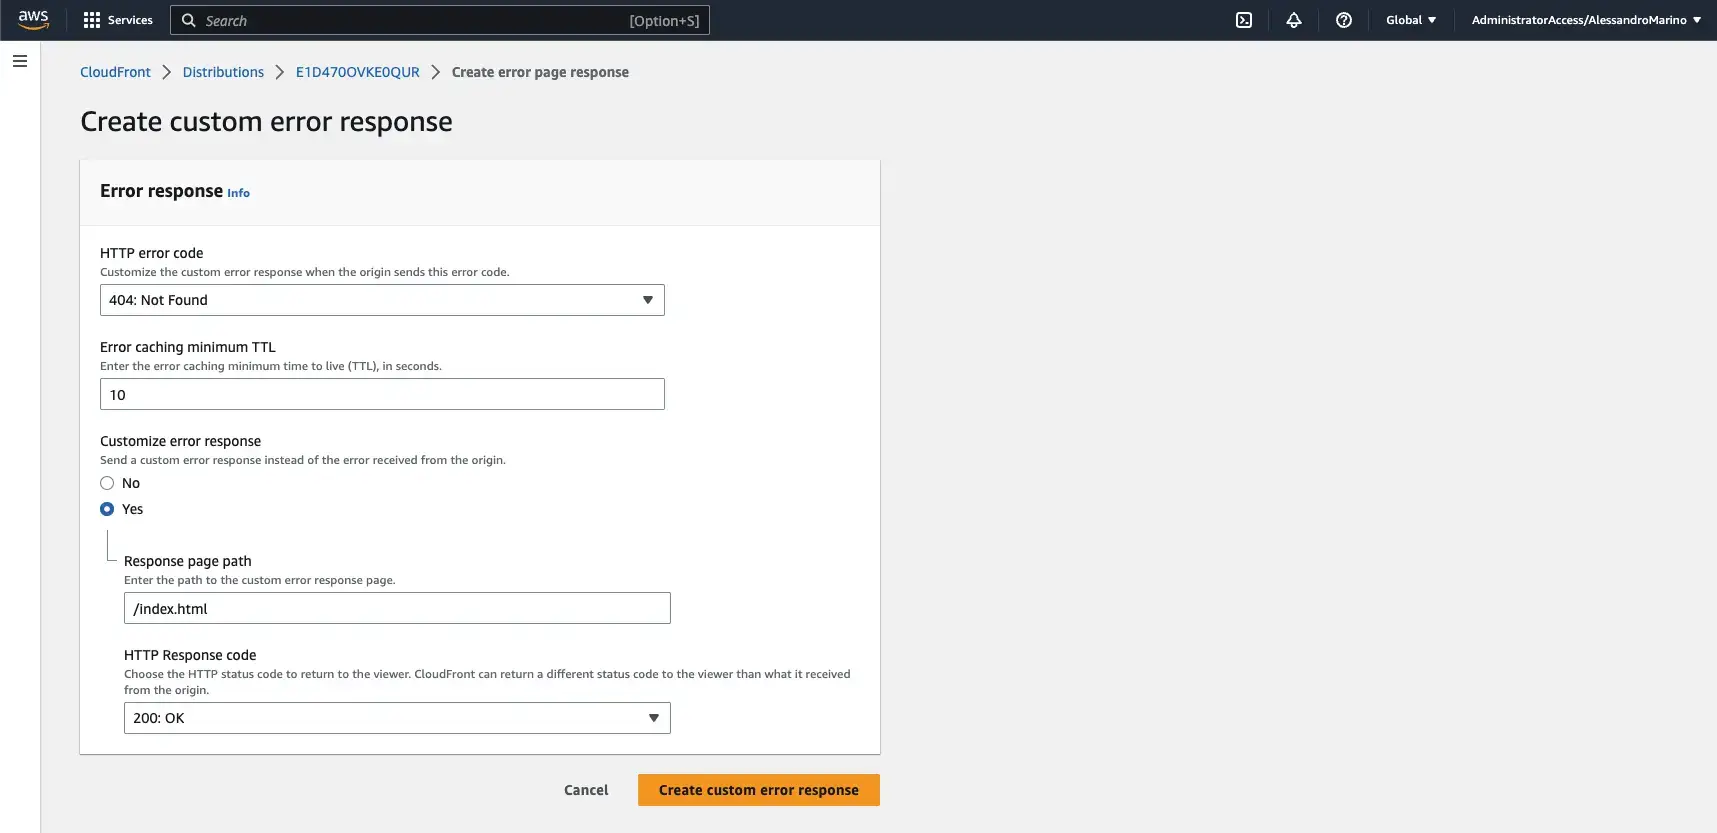
With these new settings, we can now navigate to every path of our applications without receiving errors from CloudFront:
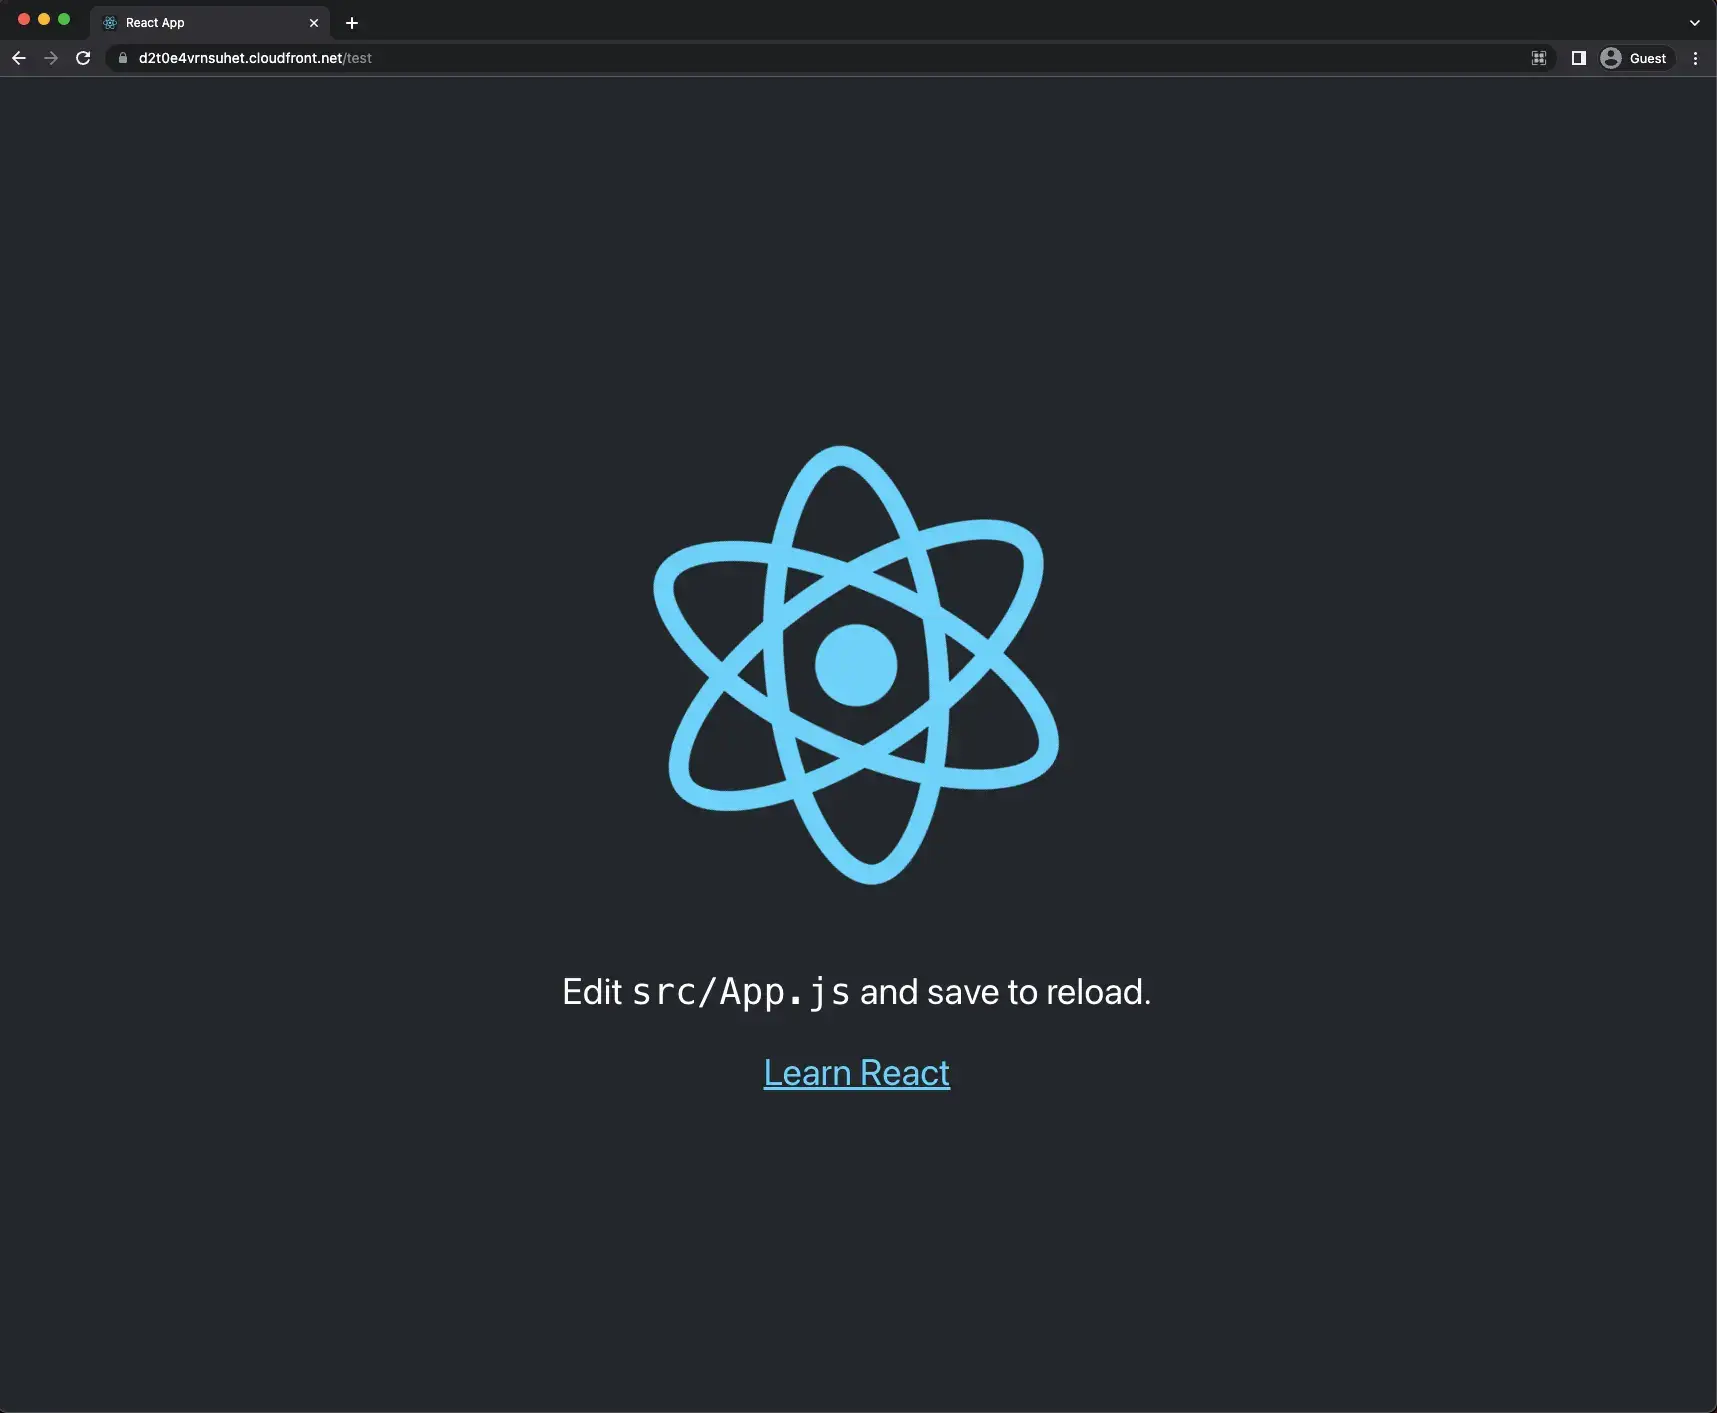
To create pages on different paths inside react we will need to use something like https://reactrouter.com/en/main
With react-router configured we can also set up custom 404 pages.


